Install Your Own Cork Board In The Kids’ Room
- By
- Roll Cork

Very large pre-constructed bulletin boards are expensive, heavy and can not be easily hung safely on the wall. The absolute best and most cost efficient method for installing large areas of cork in any room is by using Manton Brand cork rolls or cork sheets, available in 3’ and 4’ width, custom cut to your length. We recommend 3/8” thickness, which offers a thicker tacking surface.
Simply glue the cork directly to wall board (sheetrock, cinder block or other suitable substrates). Leave the clean finished edge or if preferred, use a picture frame molding to achieve a more finished look. The natural tan color of cork works with any décor, or if preferred, you can stain or paint natural cork, which is a wood product.
It’s easy for the DIY to install and you will save a ton of money. Better still, your children can pin up posters, art work, photo’s and schedules for school or activities on a cork wall surface which is attractive, durable, and will give you years of use.
Installing is a snap!
Follow these “easy to install” instructions:
Tools & Materials Needed For A Professional Installation
(Available at your local home supply or hardware store)
- Sharp Utility Knife, Carpet or Linoleum Blade
- Adhesive – recommended brand: Henry #176 or #356
- 3/16” x 5/32” V-Notched Trowel
- Hammer
- Brads/Headless Nails
Preparation
Be sure wall is clean, dry and that existing surface is secure.
Cutting
The cork can be trimmed with a utility knife, carpet or utility blade. It may require more than one pass.
Adhesive
We recommend linoleum paste applied with a v-notched trowel. Apply 100% adhesive coverage to the wall surface being corked.
Installation
After careful application of adhesive, lightly position the cork, and if correct, press firmly in place (rolling is recommended). Hammer brads/headless nails into all corners as well as areas that may not fully adhere.
Finishing
Cork is a wood product and can be stained, painted or varnished. We suggest you test on a spare piece first. For the perfect built-in bulletin board, you may tack picture frame molding around the cork.
The perfect wall
A cork wall covering does not show scratches, dents or nail holes. Ideal pin-up area. Absorbs unwanted noises. You may use fine sandpaper to remove any unwanted marks.
Easy Do-It-Yourself Illustration
Roll Cork Wall Installation
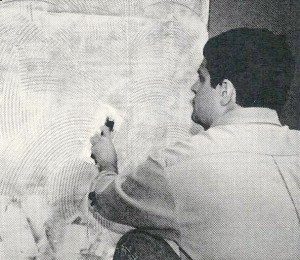
| Step 1 – Trowel adhesive directly to wall
|
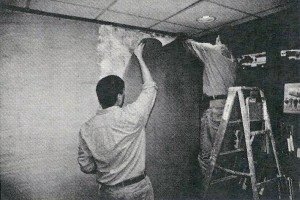
| Step 2 – Install roll cork over glued area
|
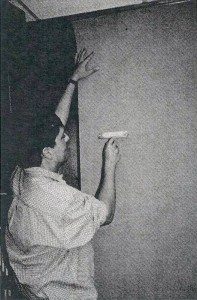
| Step 3 – Smooth out with roller or by hand
|
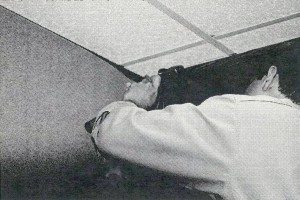
| Step 4 – Trim with sharp utility knife
|
| Step 5 – Hammer headless nails into all corners
|
| A perfect cork wall for home & office
|